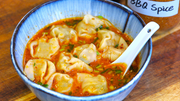
STEP-BY-STEP INSTRUCTIONS WITH PICTURES
Make the Wrapper
Add 300 grams of lukewarm water, 2.5 tsp of active dry yeast, and 1 tsp of sugar into a mixing bowl. Wait five minutes to activate the yeast. If you are using instant yeast, you don’t have to wait. Every brand of flour has different water-absorbing rates, so you have to adjust the measurement depending on your situation. The goal is to form a nonstick and elastic dough.

When you see the foamy substance, add the all-purpose flour. Then form everything into a rough dough. Add 2 tbsp of room temperature butter. Continue to knead the dough until smooth, this will take about 8 minutes. Shape the dough round. Cover it and let it proof for 1.5 hours or until it is doubled in size. The proofing time varies depending on your room temperature.

Adding butter is the first tip.A little bit of fat will wrap around the gluten chains and make the buns fluffy like cotton. It will also prevent the starch from retrograding, so your buns stay soft even if they are cold. In the old days, we used pork lard, but I think butter tastes way better.
Make the filling
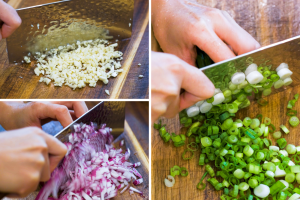
While waiting, we can make the filling. You will need 10 cloves of garlic, 4 scallions, and 1.5 medium size onions. Dice them all.
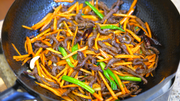
Add a few tablespoons of oil (3-4 tbsp)to the wok along with the diced onion. Saute it over medium-low heat. This is my second secret. We are caramelizing the onions and that will make the buns extra flavorful.
When the onion is slightly golden on the edge, add the diced garlic and scallions. Garlic burns fast. That’s why we add it after the onion is almost done.
Continue to stir until all the aromatics are golden brown. Turn off the heat. Remove everything, including the oil, to the side and allow it to cool.

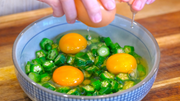
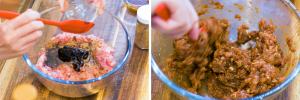
Season the ground chicken with 1 tsp of five spice powder, some freshly ground black pepper to taste, 1 tbsp of soy sauce, 1 tbsp of oyster sauce, 1 tbsp of fish sauce, and 2.5 tsp of dark soy sauce. Stir the filling in one direction until the seasonings are well combined.
These four sauces are where the sodium comes from, which seems a lot. That is because I normally like to make the wrapper plain in taste so I can season the filling a little bit heavier. That is my trick to make the buns extra flavorful without being too salty.
Add 1/4 cup of chicken stock in batches and stir it until the liquid is absorbed. Add a little bit more and keep whisking. The stirring will gelatinize the protein, which helps the meat to absorb the liquid. This is my fourth secret. It makes the filling juicy and tender. When the meat is jiggling, you are good to go.

The onion should be cooled by now, let’s add it to the filling and mix well. I diced 1.5 onions. Look how little we got after the caramelization. All the flavors are concentrated. This smells amazing. The chicken is not even cooked yet and my mouth is watering. Set it aside, and we can check back on the dough.

It has doubled in size. Make a fist and punch the dough to eliminate the air bubbles. Then, knead it on the working surface for 6-8 minutes. Watch how I do it. Use the palm of your hand and your body weight to open up the dough and spread it out. By doing that, you will break up the air pockets...... Then you just pull it back, form it into a big piece. Turn the dough a little bit and do that again......

You can also use a pasta roller to degas the dough, which is ten times easier, but not everybody has one. That is why I am showing you how to do it by hand.
Some of you might be confused and ask: why are we doing this step? That is my fifth tip to making aperfect steamed bun. The air bubbles that are formed during the first proofing are always irregular. You want to get rid of that. Kneading it again will redistribute the yeast, flour and moisture, allowing the yeast to produce finer, regular, and fluffier bubbles.
Roll the dough into a long even log. Divide the dough into 16 pieces. I am not using a scale but you can if you want to be precise. Sprinkle some flour to prevent them from sticking to each other. Cover them so they don’t dry out.

Take one piece of dough. Flatten it with your hand then pick it up. Use a rolling pin to roll the edge back and forth. The left hand rotates the dough. Repeat that and you will get a round wrapper with a thick middle and a thinner edge.

Put some filling in the middle. If you are a beginner, don’t put too much. Pinch the corner to create the first pleat. Use your left hand to help to stretch, fold, and pinch the wrapper; Repeat that all the way around. This may look difficult but you know what, it really doesn’t affect the taste. You can wrap it however you want.
When you get to the end, you will naturally create a hole in the middle. You can pinch to close it or keep it open like what I did. Doesn’t matter.

Put a parchment paper under. Rotate the bun and shape it a little bit taller so it doesn’t become too flat. Continue to wrap and finish all the buns. Leave the buns in the steamer and let them raise for another 20 minutes or until they are 1.5 times the size.

Turn the heat to high and bring the water to a boil. Once you can see the steam coming out, switch the heat to medium and start counting the time for 20 minutes.

Alright, the buns are done steaming. Turn off the heat. Do not open the lid immediately. Or else the buns will shrink as soon as they hit the cold air and you will lose the fluffiness. Let them sit there for 10 minutes.
Storage Tip: Steamed buns are freezer friendly. You have to freeze them after the steaming because the wrapper contains yeast. If it is a non-yeast wrapper, such as dumplings and wontons, you freeze them before cooking. Just make sure you are aware of the difference. You don't need to defrost whenever you want to eat the steamed buns again. Just re-steam them over high heat for 20 minutes. They will taste as good as if they were fresh. You would not be able to tell the buns were frozen. They how freezer friendly they are.
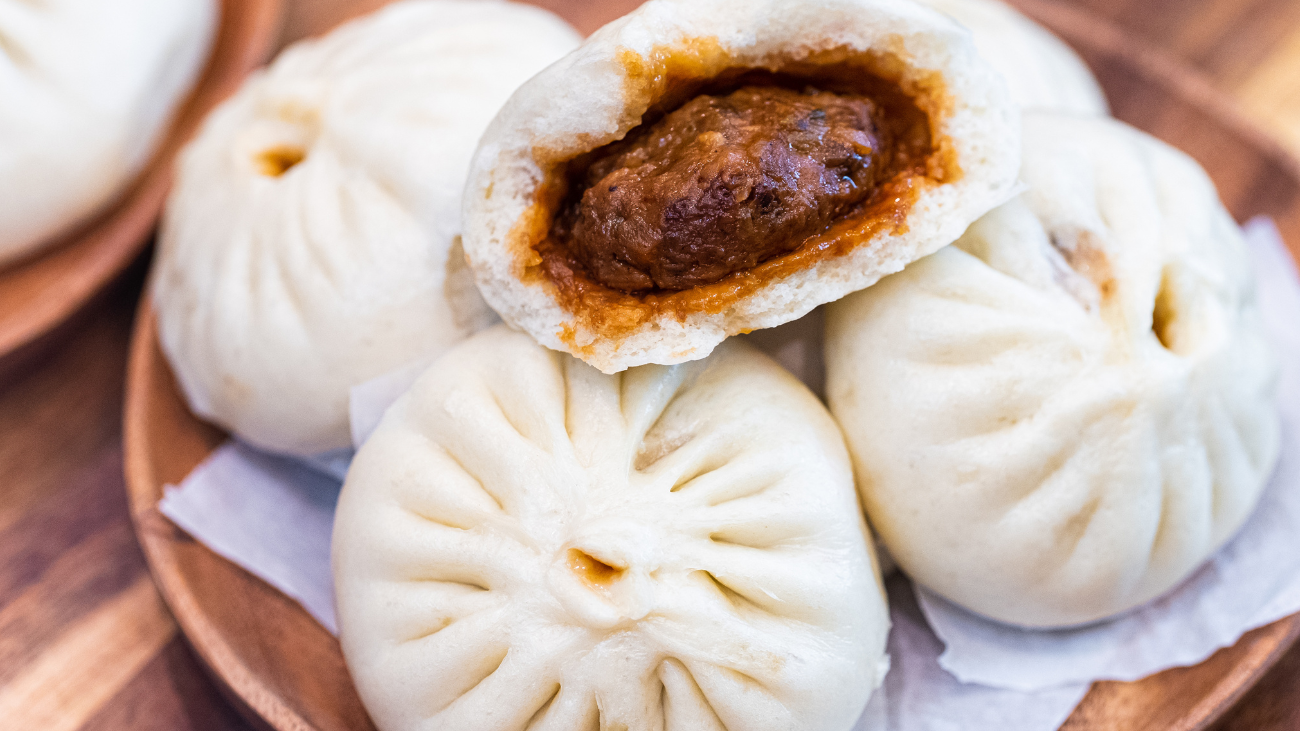
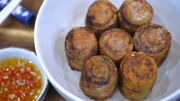
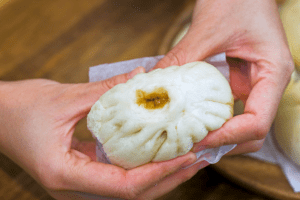
Arlight, let’s take a look at the buns!!! I love the moment when you open the lid - the steam blows into your face - so comforting. No matter how you manipulate the bun, it can go back to the original shape. That is how you can tell it is fluffy. Let’s open it. Look how juicy the filling is.
Whenever I eat this Chicken steamed bun, I am amazed by the rice, complex and pungent taste, which comes from the caramelized aromatics. The filling is juice and the wrapper absorbs a lot of the flavor. I can’t stop eating it. Do you remember all the tips? As long as you follow them, you will make the perfect steamed buns.
- Add some butter to the dough to make the wrapper soft and fluffy steamed buns
- Caramelize the aromatics to make the filling complex in taste
- Season the filling a bit saltier to balance the wrapper
- Add some stock to make the filling juicy
- do your best to eliminate the air bubbles from the dough before wrapping